WELLCOME -----FYP S2 2011 PROJECT BLOG-----SUPERVISED BY: SIR KAMALUL FAIZIN B. MOHD SUHUT

Tuesday, April 19, 2011

PRESENTATION DAY!!!!

Firstly thanks to ALLAH, for He always there for us giving me strength to this very day to write about my viva day. Okay it was not that good, since I was preparing the for only the technical stuff, electronics, and the hardware parts. Our project assessor, Sir Samsul was giving us a hard time, testing our medical knowledge. Well it goes without saying that OBVIOUSLY I can't confidently answer his questions. Some of it I got it right, but all and all he was confident that we are the one that have lose our sharpness. He told us to go back to study  medical.Wait. Study it from the SPM level. OUCH. 
Em.. Enough about my viva, let;s get uploading! :)
Okay I am about to upload my precious sketch. So Here you go guys, hope it'll help u as it helped me. :)

SENDER (XBEE TRANSMITTER)

/*Sketch ini dibuat utk menghanatar signal dr analog pin Uno 1 
ke UNO 2 utk mendisplay bubble detected ke LCD display sambil 
membunyikkan buzzer. Insyallah. */

int sensorPin = A0; 
int sensorValue = 0;
const int ledPin = 13;   //PIN 13 DA MMG ADE LAMPU LED
#include <Stepper.h>
#define STEPS 100
Stepper motor1(STEPS, 8, 9, 10, 11);
void setup()
{
  Serial.begin(19200);
  motor1.setSpeed(20);
}

void loop()
{
  //motor1.step(1*STEPS);
  //delay(2000);
  motor1.step(-1*STEPS);
  delay(2000);
  //baca analog inout dr bubble detector
  sensorValue = analogRead(sensorPin);
  //remap value utk mencantikkan signal bubble yg dikesan
  sensorValue = map(sensorPin, 0, 1023, 253, 0);
  

if ((int(incomingByte) <80)) //ni utk keadaan biasa, iaitu bila ade fluid
  {
  Serial.print(255,BYTE); //

  Serial.print(sensorValue,BYTE);
  digitalWrite(ledPin, HIGH);
  }

  if ( sensorValue > 150) //150 adalah bersamaan dgn 3Volt.
  {
  Serial.print(254,BYTE); //
  Serial.print(sensorValue,BYTE);
  digitalWrite(ledPin, LOW);
  }
  else 
  {
    digitalWrite(ledPin, HIGH); //YG NI utk aku tunjuk bahawa xde ape2 
  }
  delay(150);
}

RECEIVER (XBEE RECEIVER)

/* Skecth ini pula dibuat utk menerima data dr UNO 1 yg ada bubble 
detector, dan menyuruh LCD, BUZZER asalarm indicators. Insyallah.. 
TP FIRST NAK TEST PAKAI LCD LA DULU  */

#include <LiquidCrystal.h>
int speakerPin = 5;
byte incomingByte, sensor1;

//LCD saya memakai pin Uno 2 yg berikut:
LiquidCrystal lcd(7, 8, 9, 10, 11, 12);

void setup() 
  {
  Serial.begin(19200);
  pinMode (13, OUTPUT);
  pinMode(speakerPin, OUTPUT);
  (" Ready! ");
  lcd.begin(16, 2);
  // Print a message to the LCD.
  lcd.print("Monitoring: OK");
  lcd.setCursor(0, 1);
  lcd.print("BED 2");
  delay(1000);
  }

void loop() {
if (Serial.available()) 
{
incomingByte = Serial.read();

Serial.print(int(incomingByte));

if ((int(incomingByte) <80)) //ni utk keadaan biasa, iaitu bila ade fluid
  {
    sensor1 = Serial.read();
    lcd.clear();
    lcd.print("LINE CLEAR");
    Serial.print(int(sensor1));
    digitalWrite(13, LOW);
  }

if ((int(incomingByte) > 150)) //150 utk detect 3V, sbb kalo de bubble voltan akan naik smpai ke 3V.
  { 
  sensor1 = Serial.read(); //x de pon x pe kot??ntah
  digitalWrite(speakerPin, HIGH);
  delay(500);
  digitalWrite(speakerPin, LOW);
  delay(500);
  lcd.clear();
  lcd.print("BUBBLE DETECTED!!"); 
  Serial.print(int(sensor1));
  digitalWrite(13, HIGH);
  }
}

   for (int positionCounter = 0; positionCounter < 13; positionCounter++) {
   // scroll one position left:
   lcd.scrollDisplayLeft(); 
   // wait a bit:
   delay(250);
  }

  // scroll 29 positions (string length + display length) to the right
  // to move it offscreen right:
  for (int positionCounter = 0; positionCounter < 29; positionCounter++) {
    // scroll one position right:
    lcd.scrollDisplayRight(); 
    // wait a bit:
    delay(250);
  }
  
    // scroll 16 positions (display length + string length) to the left
    // to move it back to center:
    for (int positionCounter = 0; positionCounter < 16; positionCounter++) {
    // scroll one position left:
    lcd.scrollDisplayLeft(); 
    // wait a bit:
    delay(250);
  }
  
    // delay at the end of the full loop:
    delay(1000);
    digitalWrite (13, sensor1);
}

Both above sketches are done using XBEE Shield, so note that other XBEE may not work with this program. Also, the sketches is actually made to detect bubble from the infra red, (A0) and convert it into digital input. The ADC function has been done by MAPPING FUNCTION BY THE ARDUINO. So no need for ADC IC. (Cool eh?)

GOOD LUCK FOR THURSDAY PEEPS!!! :)


Monday, April 18, 2011

FINAL TOUCH

Okay right now I really shouldn't be writing to the blog, but I think I'll regret it if I didn't. Last touch for the project, we are working on the hardware for the prototype. Hilwani is mounting the motor to the proto board, and I am working on the ARDUINO WHOLE SYSTEM SKETCHES. I'll update the pictures tomorrow. 

Still, we are not done. There are some missing points that we haven't touch but at least there are some things that are succeed thanks to ALLAH.

Lastly, pray for us. Good luck to our friends also, La Tahzan, for Allah is always with you. :)

Wednesday, March 30, 2011

DATELINE:19th APRIL 2011

Okay there is a motherlode of shock wave shocked me after I am hearing about my FYP presentation dateline. 2 weeks to go prepare for my report, presentation, logbook, posters, and yet my software is STILL NOT WORKING!!!!!!!!

I am a little bit crazy and hazy and I am sure I am not the only one. Just have to try my best...

Ugh.... :(

Saturday, March 26, 2011

Wire Identification

Motor Identification.

 One winding is on each stator pole.Unipolar motors may have 5 leads but generally have 6 or 8 wires. In all the motors we have seen, the wires for the 6 & 8 types come out in two bundles of 3 or 4 wires resp. Unipole steppers have two coils per stator pole. In the 8 lead motors the 2 leads from the 2 coils from both stators emerge from the motor. In the 6 lead motors the two coils on each stator pole are joined (opposite sense) together before they emerge from the motor. In the 5 lead  motors each of the two joined wires are themselves joined  before they leave the motor. In the 6 wire version a multimeter (set it to 200ohm resistance range) will show which is the centre lead within each group of 3 leads. 


5 wire version

6 wire version
 Typically the resistance between the centre lead to the other two will be about 40 ohms while the resistance between the outer two leads will be twice that. Call the outer two leads in each of the two bunches of wires A & B, C & D.  The centre lead in each bunch is the power lead & goes into the pad marked +.  Note that it does not matter which way around the A/B, C/D leads go onto the pads. 

 In the 5 wire motor these centre leads  are  connected internally. Note that both + pads on the PCB are connected together.So to power a 5 lead stepper just connect the common centre tap lead from both phases to one of  the + pads. The A/B, C/D leads are connected just as  in the 6 lead motors. 

STILL NOT WORKING

Okay just an update about my Xbee..Still not working... Em... I dunno wut to do so I think I'll just go writes about my report and the other 2 assignments. I dunno how to get the receiver talking to each other. Maybe it's because of I didn't use 2 UNO's. Hm.... Yeah! I think so, but if we configures it separately, it would still works just fine. 
Em, Yes, now I just rambling on and on to make the posts seems a lot more than it actually is. 

AH, now I remember. Yesterday, we went to see Sir Kamal and bring along our so called 'back up plan' for the infusion pump. And yes it works just fine (credit to my best freind Syed Akil), and we disassembled the pump and adjust it to our own stepper motor. I do not have any pictures of it yet but I'll update it just for the sake of rubbing it to your face Hahahahaha. kidding... :)

Sir Kamal also mentioned about this awesome IC for driving a stepper motor. It is 5804 and it is considered awesome because it will only USE 2 PINS TO YOUR UNO!!!! Isn't that fantastic?? XD 


Now I am at Kuala Pilah hotel, Melang Inn rambling on what to do.. Sir Kamal and my partner Hilwani are both busy with their program at Tasik Puteri, Rawang. May Allah bless them with their good doings there. I heard they going to cook as well! I hope I can go there when I get back. Insyaallah when I have done my report. :)

Thursday, March 24, 2011

EYE SORE SORRY :P

Okay... Table below is created to make my viewer's life easier. I know that it is an eye sore when everything is written in essay form.. But please remember that the other 2 red wires from the stepper motor (unipolar) is connected to 5V. Then your stepper motor is ready to go! :)
                                                                             

Wednesday, March 23, 2011

AWESOME STEPPER MOTOR!!! :D

Alhamdulillah, our prayers and hard confusing moments of stepper motor have passed! Thanx to our lecturer of medical subject, sir Zul, who has giving us hard 2 hours of agonizing torture, brainstorms and much more to use stepper motor with our UNO. Okay, I am so excited to write about this post, I don't even know where to start. XD 

Okay firstly, we have to know what is the stepper motor that we're about to use. For our project, we use unipolar stepper motor, with 6 wires, colored with 2 reds, orange, yellow, brown and black. The 2 reds is actually the power wire, so it'll be connected to Vin at Arduino. We also have to bear in mind that these color coding are different according to it's manufacturer or country where it's made. (ahah!!! I bet you're just as shocked as I am when I found out about this!) 


Figure 1: Unipolar stepper motor, schematic diagram 

Then, the other 4 wires are determined by the stepper constructions at this one blog sir Zul has given us, found by him in the internet, and can be connected to the H bridge, used to control the motions of it's sequences. I cannot find the links that my lecturer gave me, but I am sure I remember how those wire are connected to the H bridge.

The H bridge is actually transistors to control the movements of the stepper motor, forward or backwards. the H-bridge is so named because it has four switching elements at the "corners" of the H and the motor forms the cross bar. The H bridge that we used to control our stepper motor is L293. The schematic diagram is shown as the figure below. 

Image: Courtesy of Texas Instrument Datasheet. 
Figure 2: L293 (H-bridge circuit diagram). 

So, pin 3 and 6 and connected to: black and yellow and pin 11 and 14 are connected to orange and brown respectively. Then, pin 4,5,12 and 13 are joined together and connected to pin GND at UNO. Pin 16 and 2 red wires are joined and connected to 5V at UNO, and pin 8, 9 and 1 are connected to 5V. Then, lastly connect pin 7 to 11, pin 2 to 10, pin 15 to 9, and pin 10 to  at the UNO. 

After all these wires are connected, upload these sketches to your ARDUINO. 


#include <Stepper.h>
// change this to the number of steps on your motor
#define STEPS 100
// create an instance of the stepper class, specifying
// the number of steps of the motor and the pins it's
// attached to
Stepper stepper(STEPS, 8, 9, 10, 11);
void setup(){  // set the speed of the motor to 30 RPMs  
stepper.setSpeed(20);
}
void loop()
{
  stepper.step(1*STEPS);
  delay(2000);
  stepper.step(-1*STEPS);
  delay(2000);
}


The above sketches is from sir zul also... Check out the video below, You'll understand what it's doing.


So, there you go, our stepper motor for infusion pump configures... Only next we have to determine what is the flow rate and connects the motor to a gear to push the tube. I hope we can get this all done by the end of the month. Wish us all the luck in the world!!! Insyaallah!!! :)

Saturday, March 19, 2011

VIDEO OF MY LOVABLE LCD


This is the only love I have for my software gutlessness. Oh.....why.....why none of everything's working..? Oh well, at least you guys know that your LCD works fine as long as u follows the examples on Arduino software just like mine :)

p/s: The song from the background is from Hati Yang Telah Kau Sakiti - Rossa. :p

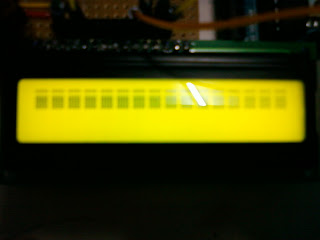
THE OTHER LCD

Check out the other LCD that we've bought. We did exactly the same with the blue one, but what came out is nothing... We uploads the same programs as the blue one had, here's the picture.


Notice the one horizontal empty lines at the contrast test?Yeah, I was wondering about that too. Maybe one of the lines got stuck with each other. I have to solder them again but now I don't have the digital multimeter with me. 


THE PLAN

1. Bubble detected from infusion pump (Part 1)
2. The Xbee from the infusion pump system part  sends a specific code to Arduino at monitoring system (Part 2).
3. The Xbee from monitoring system receives that code, and the arduino reads the code and conveys actions such as:

       i. Sends data to LCD
      ii. Sends data to 7 segment to display which bed or infusion pump have problems.
     iii. Sends data to Buzzer.

Okay now I am sure u all have an idea how my project works, the thing is the xbee won't communicate with each other!!! Click below to view what I've gone through to done the configuration, 


yeah, it works for some people but for us, it's not...maybe we didn't update our X-CTU software, but I've already ask my lecturer, he said that he did'nt need the X-CTU at all.. How mysterious.... 


LCD SKETCH

Well for those who's been asking my LCD skecth here u go..This is the only thing that worked real good with my arduino.. :( 


// include the library code:
#include <LiquidCrystal.h>

// initialize the library with the numbers of the interface pins
LiquidCrystal lcd(7, 8, 9, 10, 11, 12);

void setup() {
  // set up the LCD's number of columns and rows: 
  lcd.begin(16, 2);
  // Print a message to the LCD.
  lcd.print("Monitoring: OK");
  delay(1000);
}

void loop() {
  // scroll 13 positions (string length) to the left 
  // to move it offscreen left:
  for (int positionCounter = 0; positionCounter < 13; positionCounter++) {
    // scroll one position left:
    lcd.scrollDisplayLeft(); 
    // wait a bit:
    delay(250);
  }

  // scroll 29 positions (string length + display length) to the right
  // to move it offscreen right:
  for (int positionCounter = 0; positionCounter < 29; positionCounter++) {
    // scroll one position right:
    lcd.scrollDisplayRight(); 
    // wait a bit:
    delay(250);
  }
  
    // scroll 16 positions (display length + string length) to the left
    // to move it back to center:
  for (int positionCounter = 0; positionCounter < 16; positionCounter++) {
    // scroll one position left:
    lcd.scrollDisplayLeft(); 
    // wait a bit:
    delay(250);
  }
  
  // delay at the end of the full loop:
  delay(1000);

}


It's fun to see it scrolling out like that but I am really bummed with my Xbee and 7 segment..

SKETCHES... T_T

I am fading....Oh...So help me..here guys, this are my sketches for my project..I upload the one that is broken for u guys to try it out...and maybe u guys can figure this thing out for me..


//Pin connected to ST_CP of 74HC595
int latch = 3; //14 green
//Pin connected to SH_CP of 74HC595
int clock = 2; //12 yellow
////Pin connected to DS of 74HC595
int data = 6;  //11 blue
byte dataArrayRED[8];
void setup() //runs once 
{ 
pinMode(data, OUTPUT);
pinMode(clock, OUTPUT); 
pinMode(latch, OUTPUT);
Serial.begin(9600);
}
void loop() // run over and over again
{
digitalWrite(latch, HIGH);
delay(1000);
digitalWrite(latch, LOW);
delay(1000);
}


When I upload it, it doesn;t blink as I had hoped it would be, it just stays "on" without any fades or blink. Hm.....


The only part that lights up now, is that one part. Oh no~~ when I try uploaded some other programs that I've alter from the internet, it shows the same results. How could that be???

//Pin connected to ST_CP of 74HC595
int latchPin = 3;
//Pin connected to SH_CP of 74HC595
int clockPin = 2;
////Pin connected to DS of 74HC595
int dataPin = 6;

//holder for infromation you're going to pass to shifting function
byte data = 0; 


void setup() {
  //set pins to output because they are addressed in the main loop
  pinMode(latchPin, OUTPUT);

}

void loop() {

  //function that blinks all the LEDs
  //gets passed the number of blinks and the pause time
  blinkAll_2Bytes(1,500); 

  // light each pin one by one using a function A
  for (int j = 0; j < 8; j++) {
    //ground latchPin and hold low for as long as you are transmitting
    digitalWrite(latchPin, 0);
    //red LEDs
    lightShiftPinA(7-j);
    //green LEDs
    lightShiftPinA(j);
    //return the latch pin high to signal chip that it 
    //no longer needs to listen for information
    digitalWrite(latchPin, 1);
    delay(1000);
  }

  // light each pin one by one using a function A
  for (int j = 0; j < 8; j++) {
    //ground latchPin and hold low for as long as you are transmitting
    digitalWrite(latchPin, 0);
    //red LEDs
    lightShiftPinB(j);
    //green LEDs
    lightShiftPinB(7-j);
    //return the latch pin high to signal chip that it 
    //no longer needs to listen for information
    digitalWrite(latchPin, 1);
    delay(1000);
  } 

}

//This function uses bitwise math to move the pins up
void lightShiftPinA(int p) {
  //defines a local variable
  int pin;

  //this is line uses a bitwise operator
  //shifting a bit left using << is the same
  //as multiplying the decimal number by two. 
  pin = 1<< p;

  //move 'em out
  shiftOut(dataPin, clockPin, pin);   

}

//This function uses that fact that each bit in a byte
//is 2 times greater than the one before it to
//shift the bits higher
void lightShiftPinB(int p) {
  //defines a local variable
  int pin;

  //start with the pin = 1 so that if 0 is passed to this
  //function pin 0 will light. 
  pin = 1;

  for (int x = 0; x < p; x++) {
    pin = pin * 2; 
  }
  //move 'em out
  shiftOut(dataPin, clockPin, pin);   
}


// the heart of the program
void shiftOut(int myDataPin, int myClockPin, byte myDataOut) {
  // This shifts 8 bits out MSB first, 
  //on the rising edge of the clock,
  //clock idles low

  //internal function setup
  int i=0;
  int pinState;
  pinMode(myClockPin, OUTPUT);
  pinMode(myDataPin, OUTPUT);

  //clear everything out just in case to
  //prepare shift register for bit shifting
  digitalWrite(myDataPin, 0);
  digitalWrite(myClockPin, 0);

  //for each bit in the byte myDataOut�
  //NOTICE THAT WE ARE COUNTING DOWN in our for loop
  //This means that 000001 or "1" will go through such
  //that it will be pin Q0 that lights. 
  for (i=7; i>=0; i--)  {
    digitalWrite(myClockPin, 0);

    //if the value passed to myDataOut and a bitmask result 
    // true then... so if we are at i=6 and our value is
    // %11010100 it would the code compares it to %01000000 
    // and proceeds to set pinState to 1.
    if ( myDataOut & (1<<i) ) {
      pinState= 1;
    }
    else {
      pinState= 0;
    }

    //Sets the pin to HIGH or LOW depending on pinState
    digitalWrite(myDataPin, pinState);
    //register shifts bits on upstroke of clock pin  
    digitalWrite(myClockPin, 1);
    //zero the data pin after shift to prevent bleed through
    digitalWrite(myDataPin, 0);
  }

  //stop shifting
  digitalWrite(myClockPin, 0);
}


//blinks both registers based on the number of times you want to 
//blink "n" and the pause between them "d"
//starts with a moment of darkness to make sure the first blink
//has its full visual effect.
void blinkAll_2Bytes(int n, int d) {
  digitalWrite(latchPin, 0);
  shiftOut(dataPin, clockPin, 0);
  shiftOut(dataPin, clockPin, 0);
  digitalWrite(latchPin, 1);
  delay(200);
  for (int x = 0; x < n; x++) {
    digitalWrite(latchPin, 0);
    shiftOut(dataPin, clockPin, 255);
    shiftOut(dataPin, clockPin, 255);
    digitalWrite(latchPin, 1);
    delay(d);
    digitalWrite(latchPin, 0);
    shiftOut(dataPin, clockPin, 0);
    shiftOut(dataPin, clockPin, 0);
    digitalWrite(latchPin, 1);
    delay(d);
  }
}

Okay I give up. Maybe I'll try this after zohor prayer. Bye~~